Sunday, December 05, 2010

Road Layer and Slave CPU Code Converted

The entire code for the slave 68k CPU has been ported. This CPU solely controls road generation and interfacing with the road hardware. It's probably the most complex area of the game code. As expected, debugging the code was relatively painful. The code now needs a considerable clean-up, but I'll do that once more of the game code is hooked up, to ensure it's more obvious if I break something whilst refactoring.

The following screenshot shows a section of curved track using both road layers on Coconut Beach. You can begin to see that all the elements are coming together and we're now in a position where we have the building blocks to rewrite the higher level code.

Wednesday, November 24, 2010

Translation Update & Driving Cabinet

Currently going gang busters on the slave CPU road code. It's big, it's ugly, but it's unfortunately necessary to translate a large chunk to C++ before I can proceed with more visible aspects of the game code. The level generation is highly dependent on it. Even after translation, I expected to spend a couple of weeks doing a line by line debug - Visual Studio vs. Mame Debugger. Let battle commence.

Meanwhile, Garnet Hertz provided an update back in October, with regard to their real life OutRun driving cabinet.

Check out a recent video here:

Tuesday, November 16, 2010

Sprite Support Implemented

A big step forward; I now have full sprite support in my framework.

Furthermore, I have ported all the low-level OutRun routines from 68k to C++ that abstract the sprite hardware from the general game code. This was a considerable effort and required some serious debugging.

You can think of the dependencies as follows:

High-Level OutRun Game Code (68k) -> Low-Level OutRun Sprite Routines (68k) -> Video Hardware.

I'm at the stage where the second two components in this sequence are done. The ported routines control some of the following areas:

  • Initializing and caching sprite palette data in RAM
  • Ordering sprites based on priority
  • Converting the programmer friendly format used by OutRun game objects to the format required by hardware
  • Setting horizontal and vertical zoom settings from a lookup table
  • Setting the height and width from a lookup table in relation to the above
  • Setting the sprite anchor point
  • Setting rendering hints based on horizontal flip bits etc.

Here's a slightly dull screenshot, which shows the OutRun logo being rendered. Well most of it, the observant among you will notice I didn't hook up the bird sprites as it was getting late:


It doesn't look like much, but the important thing is I can initialize a sprite simply by setting a few jump table properties using fully ported code. Here's an example of the code required to initialize a sprite object, where 'e' is a jump table entry:

e->jump_index = 0;
e->x = 0;
e->y = 0x70;
e->road_priority = 0xFF;
e->priority = 0x1FA;
e->zoom = 0x7F;
e->pal_src = 0x99;
e->draw_props = 0;
e->control = 0;
e->shadow = 3;
e->addr = ADDRESS_OF_SPRITE_DATA;
map_palette(e);
do_spr_order_shadows(e);


So progress is good. Once I get to the stage where there is something more interesting, I'll release a demo build.

Saturday, November 06, 2010

Support for Tile Layers Implemented

The hardware tile layer is now supported in my framework. So in addition to the text layer previously mentioned, the ported code can now utilize tiles.

Here's a screenshot to provide an example of this, using ported code to display the tiles from the music selection screen:


Much of the detail from the music select screen is missing, because it also makes use of sprites, which are currently unsupported by the framework.

To summarize the components of the port, the following 68k code has been ported to C++ in order to reach the above stage:
  • Routines to setup palette ram
  • A new text routine to blit text with a height of two tiles to the text layer (this displays the Select Music By Steering text string) 
  • The routine which decompresses a tile map from rom and outputs it to tile ram
  • The routine to update tile hardware on a vertical interrupt
And the framework itself emulates the following:
  • Tile Layers
  • Text Layers
  • Palette Hardware
So we're getting to a stage where basic routines are coming along nicely. The final ported C++ code is more readable and far more concise than the original assembler.

Tuesday, November 02, 2010

The OutRun Rewrite Begins

I've made a start on the rewrite. Here's a quick summary of what I've been up to aside from brushing up on my C++ skills. Firstly I've installed and configured a suitable build environment, which consists of:

- Visual Studio 2010 Express C++
- DirectX SDK
- SDL (for rendering)

From there I've written code to:

- Read the tile and data roms into memory.
- Ported emulation code to emulate the text layer and convert the pixel format.
- Rewritten three 68k assembler routines decompiled from the OutRun source code.

The end result is that I can now use a fully ported C++ routine that blits text, in the form of tiles, to the screen. This routine takes the precise same input format as the original code. In the following screenshot, I've called the routine to display various text strings from the game. A simple call to blit_text(address_of_text_data) renders the text with the correct palette and screen positioning. Exactly the same as the original assembler.


The structure of the text data (which contains palette info, tile info and screen positioning) is pulled straight from ROM. Although I imagine I will eventually extract such data structures so that they are completely native.

I appreciate that drawing some text isn't particularly riveting, but the first steps in a project are always the most laborious. I'm pretty happy with the way things are going.

Tuesday, October 12, 2010

GOAL

Decompilation is complete: 13 months later, over 400 subroutines, ~20,000 of lines of commented assembler (a rough estimate) and countless late nights.

Pretty much everything is done to a standard I'm satisfied with. But it's important to also consider what has been omitted:
  • Sitdown Motor Code. I have only decompiled a small portion of this, as it's not particularly useful for the rewrite. It's also hard to verify without a simulation of the hardware. Having said that, I've decompiled and commented the motor code for both the upright hardware variants. This could be adapted to a simple rumble controller easily.
  • Z80 Sound Code. Currently, this isn't needed. The master 68000 CPU triggers the sound samples and sets sample volumes for the engine pitch. Therefore, it's straightforward to work out what is going on without resorting to lower levels. I may decompile this at a later stage out of curiosity.
  • Complex Algorithms. There are a minor number of routines which, although commented and broadly understood, could be better explained by someone with a better knowledge of Maths/Physics than myself. In many cases it's obvious that a routine is performing a square root or similar. But there are certain routines that I might have not fully grasped. Nevertheless, I am confident I have done enough to convert these to meaningful C routines that aren't gibberish. 
  • I'm sure I'll find and fix mistakes in my comments as I convert the game.
The upcoming enormous challenge is to rewrite the game engine in comprehensible C++. I will be releasing the rewritten source code as I work, so that those interested can follow my progress. I initially expect visible results to be slow, so please be patient. If there are any questions, please post in the comments and I'll happily answer anything sensible.

Thursday, September 30, 2010

Binary Translation, Emulation and Decompilation

Here's a link to an interesting article outlining the choice between binary translation and emulation. It might help convey why I'm taking a radical approach in porting OutRun and not automating binary translation. As mentioned, binary translation certainly has its uses in producing code that can be hand optimised and altered. However, it ultimately results in code that is also unwieldy and in hard to decipher.

Even in cases where the original source code is available and can be translated by a tool, the results are often no better. I've worked with C code, automatically translated from 68k assembler, for a number of games during my days as a mobile developer. Often the output from such tools didn't resemble the target programming language in a meaningful manner.

Although decompiling and manually rewriting OutRun is a massive task, hopefully the end results will yield code that is understandable, portable and easy to enhance. By the end of the year, I will have completed the decompilation phase and commented an estimated tens of the thousands of lines of assembler. Maybe the end results will be superior to the original source code in areas. It's hard to say, as I don't have access to it!

One of the more gruelling aspects of the decompilation is the sheer amount of code. For example, I'm currently commenting code that controls the animation relating to smoke, dirt and other debris emitted from the Ferrari's wheels. The animation format and code to handle these routines differs yet again from all previous examples. I've lost count of how many animation formats the game contains.

One of the reasons the code is so bulky is that the programmers have seemingly reinvented the wheel for various aspects of the game. It wouldn't be difficult to code a generalised animation system, at the expense of a small amount of speed. As it is, many high-level features share little in terms of code or design despite relying on the same low-level routines. This results in a lot of code duplication.

Wednesday, September 08, 2010

OutRun Unused Lap Time Code

There is a fair amount of unused code compiled into the OutRun ROMs. Much of it consists of redundant helper functions, that serve no interesting purpose.

I came across an unused routine today that's slightly more interesting. Firstly, OutRun stores the 'lap-time' of each stage you've completed - even though this information isn't really made use of (other than showing your previous lap-time on passing the checkpoint).

Either for debug purposes or as an unfinished feature the programmers included a routine to sequentially print these times during gameplay below the HUD.

Entering the following command in the mame debugger will print the lap-time for a particular stage you've already completed in a race.

d0 = x; pc = 7fea; g; [where x is the stage time to print]

Here's an example screen grab:


Here, I'm on Stage 3 and I've printed the lap-times for the previous two stages using the unused code routine. The lack of apostrophes in the additional lap print outs indicate that this idea was probably pulled at an early stage.

Code decompilation is progressing nicely. I'm on track to finish this year.

Monday, August 23, 2010

Animation Format

I've disassembled the code relating to the animation sequences displayed after you complete a route. There are five animation sequences dependent on the route you've taken. I'd hoped that the animation format would be similar to the code to handle the animation sequences during collision, for example the Ferrari rolling over. Unfortunately it was completely different.

If you're using the same revision of the ROMs as myself, you can trigger the sequences instantly in the MAME debugger with the following command:

w@60be8 = x; pc = 9978; g [where x is the end sequence number 0-4]

Animation frames  are stored in groups of 8 bytes, and formatted as follows:

+00 [Byte] Sprite Colour Palette
+01 [Byte] Bit 7: Make X Position Negative
           Bits 4-6: Sprite To Sprite Priority
           Bits 0-3: Top Bits Of Sprite Data Address
+02 [Word] Sprite Data Address
+04 [Byte] Sprite X Position
+05 [Byte] Sprite Y Position
+06 [Byte] Sprite To Road Priority
+07 [Byte] Bit 7: Set To Load Next Block Of Sprite Animation Data To 0x1E
           Bit 6: Set For H-Flip
           Bit 4:
           Bits 0-3: Animation Frame Delay (Before Incrementing To Next Block Of 8 Bytes)


Each sprite (or object if you like) is assigned an address containing the animation sequence data. The animation terminates when bit 7 of byte 7 of a chunk is set. Two other animations use the same format at the start of the game - the map waving the start flag, and the Ferrari driving in from the side of the screen.

Saturday, July 17, 2010

Object Logic

The sun has been out, I changed jobs plus I'm getting married in a couple of months. These factors have conspired against me getting as much done lately.

Having said that, I've finished decompiling and understanding the routines that handle both the logic of in-game objects and their rendering behaviour. In plain English, the scenery that makes up the levels. There are 15 routines in total with a lot of code duplication between them. The level object structure contains a field that denotes which routine should be used.

One example is the checkpoint sign at the end of a stage. Each sign consists of two objects; the pillar of the sign and the header which reads "CHECK". Each part of the sign is drawn by a separate routine. The top of the checkpoint sign is drawn by a routine that also determines when the user has past the sign (to handle further game logic like loading the next stage). Whereas the base is handled by a similar routine that doesn't make this check. Additionally, there are two checkpoint signs at the end of each level and only one of them handles the check. Therefore, it cannot be assumed that because an object looks the same, it will always be handled by the same routine.

There is further complexity in these routines. Let's take the water strip sprites, seen on the left hand side of Coconut Beach (Stage 1) as an example. Each strip is processed by a custom routine that examines its screen z value. If the z value is particularly close to the screen, the sprite is simply zoomed. However, at distances stretching into the horizon the frame is completely changed as well as zooming being applied. There are alternate versions of this routine that swap frames based on the y value of the sprite. This variant is only used on one of the Stage 5 levels.

The palette changing logic for the countdown lights at the start of the game is also embedded as part of this logic. Some routines handle collision checking where necessary too. It's worth noting that I had to play all 15 levels just to understand where the routines were used. Simply looking at the code to figure out what was going on was impossible at times.

Moving on, I'm going to work sequentially through the rest of the decompiled program code. I'm at a stage now where a significant amount of work is complete so there are just gaps to fill in.

Monday, June 14, 2010

Attract Mode Logic

The crash code is now complete, and it was more complex than I'd anticipated.

On the other hand, the logic to automatically control the player's car during Attract Mode is a lot simpler. The code can be quite basic, because the traffic in OutRun intelligently attempts to move out of your way. A simple detail most home conversions didn't pick up upon.

Here's a simplified pseudo-code conversion if you're interested:

AttractModeAI()
{
  // Check upcoming road segment for straight/curve.
  // Choose route from pre defined table at road split.
  AICheckRoad(); 
 
  // Set steering value based on upcoming road segment                  
  AISetSteering();  
  
  // If speed is below a certain amount, just accelerate
  if (car_speed < 0xFA)
  {
    accelerator = MAX_VALUE;
    return;
  }
  
  // If AI Traffic is close, set brake on
  if (traffic_close)
  {
    traffic_close = false;
    brake = 0xC0;
  }
  
  // If either wheel of the car is off-road
  else if (wheels_offroad)
  {
    brake = 0xC0;
  }
  
  // Upcoming road: Straight Road
  if (road_type == STRAIGHT)
  {
    curve_counter = 0;
  }
  
  // Upcoming road: Curved Road
  else
  {
    if (++curve_counter == 1)
    {
      // Set road curve value based on hard coded road data. 
      // High value = Sharper Bend
      road_curve_value = value - 1;
    }
    // toggle brake on bends. 
    // The brake flickers on/off in OutRun attract mode
    else if (road_curve_value != 0 && ((road_curve_value <= 0xA) 
            || (road_curve_value & 8)))
    {
      brake = 0xA0;
      road_curve_value--;
      return;
    }   
  }
  
  accelerator = MAX_VALUE;
  return;
}

Thursday, June 03, 2010

Collision

I'm currently working on disassembling the OutRun collision and crash handling code.

Once you start looking into the code in detail, you realise what an adventurous coding exercise OutRun is. I mean, how many ways do you need to crash in one game? Evidentally quite a lot... I can't quite fathom the level of detail they went into with regard to the collision routines. It's not sloppy coding as such, just simply attention to detail on an excessive scale. Sega  must have had a supply of strong caffeine in the 80s.

Check out the graph I produced in IDA below of one of the main crash routines. This isn't even all of the collision and crash code, it's simply one function which can be toggled by the master jump table!


On a positive note, all the code blocks covered by the above graph are now decompiled and commented. On a negative note, mainly for my sanity, there are still more. Argh!

There are two main types of crash in OutRun: hitting traffic and hitting scenery. Hitting scenery can be broken down into three new types of crash depending on the speed your travelling at. There's the low speed bump, where the car rises in the air (using the same movement lookup table as the birds flying on the logo in attract mode fact fans), the medium speed spin and the full speed flip. Each of these has multiple internal states to contend with and each crash factors in aspects like your speed, road curvature, height, whether there's a further crash resulting from the first crash and a selection of passenger animations. For example just the lower speed crashes offer a choice of the woman hitting the man, the man scratching head & girl tapping car, the man scratching head & girl pointing or man looking subdued and girl pointing.

Also, whilst the object format of the crash routines bears some similarity to previous bits of code I decompiled, actually most of it is new. Plus the animation sequencing format seems to be different, though I figured that out too.

PS I'm going to bed!

Tuesday, May 18, 2010

An Interview With Alan Laird

Alan Laird worked on the Sinclair Spectrum and Amstrad CPC conversions of OutRun for Probe Software in 1988. Back in January 2000, I e-mailed him a series of questions about the conversion and he kindly took the time to answer.


I've answered your questions below, its been over 10 years so my memory is a little bit hazy in places.....

Firstly, how large was the team that worked on the Spectrum conversion, and how were the different tasks divided up?

Basically there were two people, Ian Morrison and myself. I've been out of touch with Ian for a number of years now so I don't know what he's doing.

Ian did most of the 3D engine code and I did everything else, but towards the end of the project I was pretty much the only person on the Spectrum version as Ian started working on the ST version.

We also did an Amstrad version based on the Spectrum code and John Bankier helped out with that.

How long did the conversion take?

Don't remember exactly. All I remember was that they wanted a Xmas release and the production house (Probe) got so paranoid about us running late that I ended up spending 2 weeks in their office in London. I think we got it done somewhere around early December after starting in the summer so about 4 or 5 months elapsed, this was whilst attending university, it was a rather stressful time.

Were you initially worried that the Spectrum would not be capable of replicating the original machine, and what were the main difficulties you encountered?

Yes, very worried, but it was too much of an opportunity to pass up. Clearly speed would be a difficulty, Outrun has a lot of graphics on screen so keeping the frame rate up whilst drawing those was difficult. Secondly because we didn't have fancy bitmap scaling hardware like the arcade machine, we had to store each graphic at a range of different sizes. There was a trade off between having enough sizes so that the game looked reasonably smooth and the storage space.

What hardware and software was used to convert the game?

It was developed on a PC based system called PDS that some other game developers had hacked together. This was a pretty decent Z80 assembler/debugger environment and at the time I think we used some flavour of 286 with initially a 10M hard drive. There was a dedicated comms board plugged into the Spectrum and an ISA card in the PC to form a kind of parallel interface between the two. You could squirt the entire assembled code down to the Spectrum in a fraction of a second. Much easier than the previous system using microdrives, multi-part assembles and the interface 1 network.

Were the graphics and sound written from scratch, or were some elements borrowed from the other conversions?

Outrun was really the third in an evolving series of driving games. First we did Nightmare Rally which was an original idea that Ian and I put together and then hawked around games houses before Ocean published it. Off the back of that we got a contract from Activision to convert Enduro Racer. This added the element of a track to the game. And off of that we got the Outrun contract from Probe. At each iteration the graphics engine become more sophisticated. Turbo and Europa were even better, they had much more flexibility in the 3D engine,infinitely variable curves and hills in the road and were getting decent frame rates as well. Sound code always came from third party specialists.

 Nightmare Rally

OutRun

Turbo OutRun

Did you see or work on any of the other conversions, and if so, how do you think they compared?

As mentioned above I had a hand in the Amstrad version and Ian worked on the ST and Amiga versions. Amstrad was always difficult because it had the same processor as the Spectrum but twice as much video memory to move around. Amstrad users also hated getting Spectrum rewrites since they didn't take full advantage of the graphics flexibility. We didn't have much time on the Outrun conversion but Turbo and Europa were pretty decent. The ST and Amiga, although they were 16 bit 68000, still weren't terribly fast pieces of hardware and expectations were much higher so invariably they disappointed.

 
Amstrad CPC Conversion

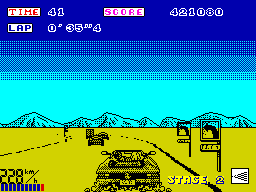
How did you decide where to draw the line between graphical accuracy and speed? I ask this because the graphical accuracy on the game is outstanding, but one of the main criticisms at the time was that the speed suffered on certain stages.

There was a constant battle between me and the production house (Probe) over graphic density and speed. I wanted the game to look as realistic as possible and since I had full control over designing the course layouts I could put in lots of graphics to make it look good. Of course this brought the frame rate way down, I think it was averaging about 3fps in the end, but this game was never destined to be lightening fast.

A nerdy question: On the back of the OutRun packaging, the Spectrum screenshot is clearly different from the final game. The lorry is much larger and detailed, the sky is shaded differently, and the on-screen statistics are in different places. Why were these changes made, and does a copy of this early version still exist?

I think the graphic on the packaging was a mock up done by an artist so that it could get to the printers on time.

The large graphics were one of the first victims to storage space. We would generate a series of graphics at different scaling factors from full size down to almost nothing in steps of say 10%. What you find is that the largest graphics are only on screen for a fraction of a second as you zoom by something and they take up the most space, so naturally they got dropped pretty quickly. If we'd had the space they could have been left in since they are on screen for such a small amount of time they hardly affected speed.

The multi-loading system used on OutRun was rather complex, as it would load levels into memory as the game progressed, whilst holding as many as possible at one time. Was it developed specifically for OutRun?

Don't really remember too much about this aspect. I think the 48K version could hold about 4 levels at any one time including the most recently played level. So if you took the same route through the game each time you didn't need to reload but if you took a different route you would need to. Again it was down to the space needed by graphics, they just wouldn't all fit at the same time. We did +3 versions of the later games which made the whole thing a lot easier.

Did Turbo Outrun and / or Outrun Europa use the same engine as OutRun, or were they written from scratch?

As I mentioned, they were evolutions of the Outrun engine. By the last one the engine was actually getting quite good. Rendering speed was much faster both for the 3D landscape and the graphical objects. Not bad for such a primitive machine, remember that the Z80 didn't even have hardware multiply and divide operations so imagine how cumbersome doing 3D graphics was. We did everything in fixed precision arithmetic, 8 bit whole part, 8 bit fractional part and implemented multiply and divide using loops. For anything more complex like trig and log functions, we used pre-computed look up tables. Compare with today's Voodoo chipsets or a Dreamcast console, kids nowadays have it easy....

Can you briefly summarise the work that you have done since Spectrum programming?

I finished off my undergraduate degree (in Comp Sci) and then did a postgrad degree. After that I joined Baring Securities (of Nick Leeson fame) which later became ING Barings, working there for 5 years in London and mostly Tokyo. Now I'm with Merrill Lynch in Tokyo managing a development team doing real-time stock trading systems in C++. Ian set up his own games production house call ICE which did Turbo and Europa amongst others. Last I heard, which was about 6 or 7 years ago, he was headed to the States.

I lost interest in home computers for a long time and didn't really play games at all except for the odd arcade driving game until a couple of years ago when I got a couple of Voodoo cards for my work PC and discovered Quake. I've gotten right back into home computers now, although on a slightly different scale, with a network of Sun Sparcstations, a permanent internet connection and my own web sites. Its interesting to do a speed/memory/storage comparison of then and now. I started out with a 1K ZX81 and now I have 256M in my biggest machine, that's a quarter of a million times more memory amongst many other improvements. I still have all the old kit in my attic in London, maybe someday I'll dig it out and see if I can read those old microdrive catridges and floppy disks.

Hope this was interesting, it has been for me going back to those days and from all the interest on the web I see that the old games still live on. Thanks to everyone who's taken the time to collate information, build emulators and collect games.

Alan Laird - 2/1/2000.

Another article regarding the conversion can be found in the following issue of Sinclair User magazine from 1988:


Tuesday, May 11, 2010

OutRun Easter Egg - The Definite Guide!

For a while it's been known that on some versions of OutRun holding the start button, just before a checkpoint, will reveal a secret message: "PROGRAM YU SUZUKI 1986 SEP".


However, it's also been known that this easter egg does not work on all versions of the game.

Well, that's until now. I've decompiled the code related to this and will list the differences below, including how to enable this easter egg on later revisions of the game.

Sitdown/Upright Revision A: This version works as stated. Just before any checkpoint, hold start (just before the sky is due to cycle to the upcoming level colour) to reveal the message. Easy.

Sitdown/Upright Revision B: Activating the egg on this version is more complex. First you will will need to achieve a high score, and enter "YU." as your name, complete with trailing full-stop.


Furthermore, the easter egg can only be activated when transitioning from Stage 2 to Stage 3 on this version of the game. Yes, they've actually included extra code to handle this.


It should also be noted that the egg can only be displayed once and is then deactivated. Also, if the user enters "YU." again on the high score table, the egg will also be deactivated. I'm not certain why this required such a rewrite - it's not as if it allows the user to cheat in the game.

The easter egg code is buried in the middle of a routine to handle setting up the sky palette fade from one level to the next. Which possibly indicates that the programmer wanted to keep the code hidden from more common routines that were shared with the team. I wonder who wrote this piece of code, and why it was heavily altered between revisions?

Aside from that I've completely disassembled the entire service test code - which enabled me to figure out a bunch of minor book keeeping information. I've also disassembled the palette changing code that handles the road, ground and sky when transitioning between levels. I've even disassembled some rather dull code relating to the coin chutes. Next - there's a load of tilemap code to be looked at. The quest continues!

Saturday, May 01, 2010

Service Test

I'm debugging the service test code at the moment. After some of the recent decompilation work, I fancied something easy.  Nevertheless there are still some cool things to be discovered.

One thing you'll notice in MAME, is that the "Motor Test" fails:


The motor test, which only runs if the DIP switches are set to the Moving cabinet type, essentially moves the cabinet from left to right. The limit switches activate at the extremities and the pot values from the motor are recorded. A magnet also detects the centre position.  

I quickly hooked up a simulation of the motor hardware in the Jemu2 driver I coded, using knowledge from the decompilation. Here are the results:

Notice that there are no error messages, and the values are correctly recorded. 

As far as I can see register 0x140001 works as follows:

Bit 3 = Set to indicate left limit reached
Bit 4 = Set to indicate centre reached
Bit 5 = Set to indicate right limit reached

The desired motor position is written to register 0x140003.

The actual motor position can by read by writing '12' to the analogue select register 0x140012.

Wednesday, April 14, 2010

Finally, my gold plated Ferrari is here!

In my unending quest to fill my house with OutRun related junk, I picked up the following Sega OutRun branded gold Ferrari:


The seller had this to say, I've no idea how accurate this information is with regard to the number produced:

Rare Sega "Out Run" Commemorative Ferrari 1986
Custom cast, gold plated, all metal scale model Ferrari Testerossa
Approx. 4 3/4" long x 1 1/8" high and weighs about 1.5lb
Fewer than 100 were produced and presented to the top tier arcade game distributors.
The model's exterior rear view mirrors while no longer attached, can be easily re-mounted and are included with the purchase

The only other information I can find this, and in fact the only other mention of it I've come across is on the following webpage

The only information I know about it is that it was given out by Sega, apparently as part of a trophy to retailers who sold copies of Outrun. The back of the car, right behind the rear window, "OutRun" is engraved in it, and the license plate says "Sega". The bottom also has a nut on it, which is a definite indication that it is the top piece to some kind of trophy. After I bought it 8 years ago, I have never been able to find any other information on it since.

Intrigued, I asked for a bit more information and it seems they were samples for an advertising promotion:

They were salesman samples so they are quite rare, They were made to show Sega some of the advertising possibilities they could choose from and I got them directly from the salesman who had them made. He tells me they were never displayed, only passed around by top executives at Sega.


A gold plated Golden Axe branded axe was also thrown in with the bundle.

Does anyone else own one of these? And does anyone know whether it was in fact part of a trophy?

Monday, April 12, 2010

Progress Update

Quick update on what I've been upto over the past week. I've decompiled and commented the following code:

- Palette setup for ground colour, road colours etc.
- Palette setup for sky shading effect
- Code to convert internal increment value to user friendly KP/H display. Including tile blitting.
- Code to setup the speed at which to scroll the sprites. This is independent from the road scrolling. 
- Code to adjust x position of the car based on the curvature of the road, to ensure car 'sticks' to the road on curves.
- Code to convert steering value from hardware to a meaningful change in x position
- Code to prevent car from straying too far from the boundaries of the road.

There is still a LOT of code to go. This is a long slog!

OutRun Version Differences

Here are some details of the visual differences between  the first revision of the OutRun ROMs (deluxe sitdown) and the final revision (sitdown/upright, Rev B).
Notice the omission of "Select Music By Steering" on the original version:


Stage 1, Coconut Beach, has a different track layout. 
Notice the absence of scenery on the right hand side, and in the central reservation.
The dual lanes at the start of the track also merge more quickly into a single road on this version.


Notice the strange positioning of the Flamingo huts on the right hand side of the road. These are replaced with palm trees on the later revision.

 
The well documented course map differences. Older revision shown top. I presume the levels were reordered, so that the more visually impressive levels were shown earlier in the game.


Service Test. Lack of Backup Ram clearing.
Memory Test. Deluxe Sitdown and later revisions.

Can anyone find any more? Once I complete the disassembly of OutRun, then it will be easier to compare the revisions to find out what other subtle, non-visual, changes were made.

Thursday, April 08, 2010

Code Reuse At Sega

Out of curiosity, and to follow up a previous post, I examined some of the Super Hang-On code to figure out the level of code reuse between the games as they share the same hardware. A quick glance at the code shows that a lot of the core routines, responsible for generating the road detailed in this post are identical. It appears that the slave CPU code to handle road splits is removed from Super Hang-On.


It's probably not a surprise, given that there are other obvious similarities between the titles, including some of the sampled sounds being identical.

Now the OutRun hardware supports two road layers. But as far as I know, Super Hang-On only uses a single road layer. Interestingly, there was a conversion of Super Hang-On to the Space Harrier hardware, which only supports a single road layer. Presumably, OutRun wasn't converted in the same manner, because of its reliance on two road layers for the wider roads (even when two distinct roads aren't displayed, the two road layers are sometimes in use).

One other example of code reuse I've found is between OutRun and Sonic the Hedgehog 2 on the Megadrive. Both games share the same random number generator, right down to the default random seed that's used.

Wednesday, April 07, 2010

OutRun Yu Suzuki Interview

Back in 2008, RetroGamer magazine ran an interview with Yu Suzuki discussing the development of OutRun.

The article can be read online here.


It's interesting to read about the features that didn't make it into the final game: 

“Because of budget and development time limitations, some of the contents I’d planned had to be squeezed or cut. I’d made preparations for eight individual characters and I wanted to include various events at each checkpoint, which would have made the player experience a story; something like the Cannonball Run film. I also wanted to give players a choice of supercars to drive, so that they could enjoy differences in car performance.”

Personally, I'm pleased the checkpoint events didn't make it, as they'd have potentially spoilt the flow of the gameplay. The changeable characters make sense, as the player sprites are drawn separately from the car sprite and have a table of offset co-ordinates. This also allows the car sprite to be horizontally flipped (it wouldn't look good if the players swapped seats, as per the Amiga port). There's no mention of the dual direction traffic that I uncovered in the game code though... :)

In other news, I've returned to working on the Master CPU decompilation at the moment. There's still a heck of a lot of code to plough through, but it's relatively trivial compared with the previous Slave CPU work.

One subtlety that I noticed whilst working on the code is that the position of the shadows in the game change dependent on which direction the car is facing (in practical terms it's set by the x position of the tilemap backdrop). This attention to detail is somewhat outstanding - I'd never even noticed this previously...

Wednesday, March 10, 2010

OutRun Automapping Tool

At last! I've completed my disassembly of OutRun's slave CPU code. This was by far the most difficult part of the project to date. First, a quick summary of how the road data is stored.

The road data is split into three main components:

1/ The path that the road takes. This is stored as a set of words. Each word ultimately represents the x change of the next road segment, and length of that segment. This data is parsed by a series of functions that interpolate the data and create a nice smooth curve, dependent on the adjacent road segments.

It should be noted that this data does not control the width of the road, the height of the road or how many road layers are enabled.

From what I've seen each stage has a unique path and no data is reused. However, the road split at the end of each segment is reused and the data is mirrored on the x-axis to create the road split.

2/ The height of the road segment. This is divided into a series of segments. Multiple segments are applied to any stage and are reused between stages.

3/ The width of the road segment. This is actually controlled by the Master CPU. I've disassembled the relevant code, but will revisit it at some stage soon.

Finally, the x1, x2 co-ordinates of the road segment are used by the sprite hardware and the scenery positioned on the level.

Interestingly, this means that Outrun's road layer is very dynamic. It's possible to swap the sprites from one stage, with the road data from another. And it's easy to change the height mapping of any point of a level. Very little is hardcoded in terms of screen positioning, and the final world is very much generated in realtime. It's easy to see why an entire 68000 CPU was dedicated to this one task.

As a test of my understanding, I've already converted some of the functions from assembler to a quick java utility. This utility can output the path (point 1 of the list above) of any stage of the game as a CSV file that can be represented by Microsoft Excel. So now it's easy to create an accurate visual map of all the levels, to aid players of the game. Admittedly, once I amend this tool to take the width into account, it will be more useful.


Here is a link to an example from Stage 1 (coconut beach). As mentioned, this map doesn't contain the road split information at the end of the level.

Finally, pleased and amused that people have found the blog interesting - most unexpected. Keep the comments coming.

Monday, February 22, 2010

C Compilers

Following my previous post, where I questioned whether Gauntlet's code was written in C as opposed to assembler, I've come to the realisation that OutRun's slave CPU code was probably generated by a compiler and is not hand-written assembler.

The slave CPU controls the road rendering. So essentially it generates the curves, height variation, road splitting and appearance, from the level data.

This has added an extra layer of obfuscation to the decompilation, as the resulting code is less logical and is convoluted to follow. Maybe AM2 had spare CPU cycles to play with, and decided to simplify the source code to this complex area by writing the code in C, as opposed to assembly code as used by the main CPU.

One of the first instructions sets one of the address registers to point at the start of RAM:

lea ($60000).l,a5

The a5 register is never changed and there seems to be an over-reliance on using this block of memory, where a data register would be much faster:

move.l  d1,$712(a5)
; ...
add.l   $712(a5),d2     ; Why not use add.l d1,d2?

And then there are blocks of code that are just pure spaghetti or irrelevant. I don't know much about compilers, but back in 1986 it's clear they produced dreadful code.

ROM:00001C80 tst.w   $720(a5)
ROM:00001C84 beq.w   *+4          ; What is this here for?
ROM:00001C88 addi.w  #$100,d1

On the other hand, a quick look at Gauntlet's code in Mame's debugger does not seem to yield equal levels of insanity. Maybe Gauntlet was coded in assembler after all.

I'd like to know what compiler Sega/AM2 were using. Does anyone know if it's possible to determine from a signature in the code? Is C the likely source language?

UPDATE: Some useful information in the comments below. Thanks to the help of a couple of readers, it's possible that portions of this code have been adapted from a previous Sega title that uses similar road hardware. The original Hang-On from 1985 could be a contender, despite the road hardware differing. Would have to examine the code to be sure. I'd assume that Super Hang On, released after OutRun, which had identical road hardware, reuses this code. 

This would also explain why certain blocks of code are unused, the alternate coding style and the relative addresses. As pointed out, you might expect to see NOPs and other quirks if C compiled. 

UPDATE 2: Checked Super Hang-On, which runs on the OutRun hardware. A quick look through its slave CPU code reveals much of it is identical.

Tuesday, February 02, 2010

C Compilers for 68000

Reading The Making of Gauntlet, I was interested to read the following comment:

With the switchover from the 6502 to the more capable 68000 microprocessor, the development environment at Atari had changed considerably. “We were actually entering our own code at this point. Our development tools changed, too. We were now programming in C instead of assembly language,” says Logg.

Was the game really programmed in C, as opposed to assembler, back in 1985 or is Ed Logg remembering this wrongly? Firstly, the Gauntlet hardware consisted of a 68010 CPU (not the 68000), with a 6502 for sound. Secondly, C compilers in the mid-80s weren't as robust and optimised as today. I can envisage a front-end or name entry screen being programmed in C. But I would expect the majority of the game engine to be assembler for performance reasons. Especially when the article mentions that optimisation was required to ensure the game ran acceptably with so many characters on-screen.

Does anyone have any thoughts on this?

Thursday, January 14, 2010

Hidden Voices

If you try OutRun's Sound Test, you'll notice there are four voices you can apparently play. These are the speech samples Get Ready, Congratulations and Check Point. The forth sample, "Voice 4", doesn't work. If, like me, you've lost sleep over such a monumental issue - read on!


The elusive fourth voice is, in fact, still in the ROM files, namely those containing the PCM sample data. You can import these ROMs straight into a sound editor like Audacity and play them. I imported the raw files as PCM 8-bit unsigned, with a sample rate of 8000Hz. Note that the sample rate of the individual samples does differ though.

The 192K of sample data is stored across the following files:

opr10188.71
opr10189.70
opr10190.69
opr10191.68 - This file contains Voice 4
opr10192.67
opr10193.66

These PCM files contain all samples from the drums used in the music, through to the sound effects and speech.

You can hear an mp3 I exported of the voice here. The voice is "You're Doing Great", and seems to be stored at around 4000Hz, which is a lower sample rate than the other voices, which are at 8000Hz. I imagine the sample was removed because the designers couldn't figure out a good way of invoking it.  There is already a voice at the checkpoint stage, which is the main way of determining your progress. Using the voice mid-level, based on your current position and time, could have created bugs or just not proved that compelling.

I should admit that I haven't debugged the sound code much, so a lot of this is based on pretty rough experimentation. I haven't delved into the code to see if it's easy to hook this sound up somewhere with brief debugging. There are certainly no high-level calls from the 68000 code, as I've listed every sound that can be played (and there are more than just those in the sound test). Looking at the Z80 code might yield more information. But I don't envisage having to port this directly, as I am planning with the 68000 code.

Update: Thanks to the JAMMA+ forum I've been informed this hidden voice is apparently used in Space Harrier. So maybe the OutRun developers started by using some of the Space Harrier code as a framework. Certainly some of the error messages are the same as shown in previous blog posts.

Tuesday, January 12, 2010

Level Select

Yesterday proved a little more fun. Whilst debugging the slave road CPU code, I figured out how to change the level order in OutRun. Using this, you could easily make a level select. Also found a way to have the road data from one level, with the object data from another. It doesn't always work, but does allow you to make some interesting permutations. Some level data for Stage 1 is also hardcoded, but when I finally rewrite the engine in C, this will be trivial to solve.

Monday, January 11, 2010

Slave CPU Code

Spent most of yesterday working on the code that runs on the slave CPU. On a positive note, there isn't much of it. The code is minimal compared with the main CPU. It's a loop that handles rendering the road. On a negative, progress is slow. I spent most of the afternoon trying to figure out a few hundred lines of assembler and now feel like gouging my eyes out.

Tuesday, January 05, 2010

Outrun Unidesa Manual

I've had no free time lately. But the following manual arrived in the post:


It's an OutRun arcade manual from a Spanish company called Unidesa (Universal De Desarrollos Electronicos S.A.) who seem to have licensed OutRun at some stage. The company still exists and has a website here.

I expected it to be a straight translation of the common English Sega manual that can be found at KLOV.

Whilst the manual initially does contain translations of the service tests and dip switch settings, it interestingly contains additional technical information not present in the Sega manual. Most importantly, it contains a fantastic diagram of the OutRun PCB, with all components labelled. If I had a scanner, I would scan these in, but for now I will simply list the additional pages. The diagrams are not hand drawn, like the English Sega manual.

1/ Video Board Block Diagram:
- Video board clearly divided into labelled components including ROM, RAM, Power Outputs and the explanations of what functions the other areas of the board performs. Each component is numbered.

2/ CPU Board Block Diagram
- Similar to the above. Divided into Main CPU, Slave CPU, Road Character Generator etc.

3/ General Wiring
- A superclear wiring diagram for the Outrun cabinet. This is far better than the Sega effort. Each wire leading into the PCB and other components is clearly labelled with its function and colour.

There are also a couple of detailed technical pages about the Hantarex monitor, that don't appear in the Sega manuals including a nice circuit diagram.

If anyone knows whether there was another manual to accompany this one, or has further information - please let me know.

Update: Here is a picture of the Unidesa white OutRun cabinet, via the JAMMA+ forums. The PCB is different from the Sega version, which would explain the alternate diagram in the manual. The game uses the European track layout.