I purchased up the internals of a Super Hang On shell a few months ago. The package included an untested PCB that, judging from the photos he sent, had suffered a tough life. On arrival, the PCB booted and ran which was a great start, but no road was visible.
On inspecting the underside of the PCB, it was a real dog's dinner with repairs all over the place. It looked like someone had gone wild gunshotting parts of the circuitry to fix a previous problem. There were jumper wires connecting parts of the PCB where traces had been damaged. At this point I wrote to Mark at Retroclinic who kindly provided details of the work he'd done on the board, so I can distinguish his work from the chaos that had also occurred.
The top PCB is responsible for road rendering and is identical to the OutRun PCB, including the PALs. Super Hang On is similar to OutRun but with inferior sprite hardware, which is why the scenery is rather sparse in comparison from a gameplay point of view.
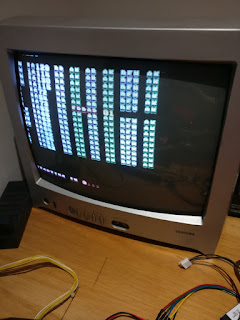
I quickly ported the OutRun test ROM to the Super Hang On hardware. This involved changing a number of memory addresses as well as the memory mapper configuration code. This proved that both the Sub CPU and Road RAM was fine. (For those waiting on the OutRun test ROM, it's now with Alex who will be releasing it in due course.) ignore the sprite hardware failure below, I didn't adapt the code to handle SHO's sprite hardware correctly.
I could now focus on a smaller section of the schematics. I verified the Road ROM which was good. I swapped the PALs responsible for the road mixing and road bit extraction with a known good OutRun PCB to eliminate them from the equation.
Using my logic probe, I noticed that the Output Enable pin of the Road ROM was stuck high, essentially meaning the ROM data was not being used. Using the schematics, I traced the problem back to an LS174 @ IC14 (quad d flip flop). On closer inspection there was some signs of corrosion around its legs.
Piggybacking this chip restored the road circuitry. I mistankenly swapped out an IC downstream beforehand. If I'd used my scope and not been lazy, I would have avoided this.
Shortly after fixing the problem, another issue arose whereby there was a further visual glitch with the road hardware. Notice the colour band in the sky and the blurry road below. I swapped the test ROMs back in and they reported a failure with the Road RAM (or more likely the logic chips connecting them to the CPU). In game it looked like a visual glitch when the hardware performs the Road RAM swap.
However, the problem then vanished! And no amount of pressing on chips, flexing the PCB or power cycles could replicate it. I imagine it could return in the future if a chip is on the verge of failing somewhere, but hard to fix a problem you can no longer reproduce. If anyone has any thoughts on this then let me know.


