Showing posts with label cannonboard. Show all posts

Saturday, February 14, 2015

CannonBoard: Latest Hardware Iteration

Colin has populated the new version of the board (apart from the motion control 90’ connector). Click on the image for a larger version.


It's looking pretty awesome, don't you think? 

Tuesday, June 17, 2014

CannonBoard Hardware Update

Colin is busy at work with the latest iteration of the CannonBall hardware. He's constructed a bare bone version of CannonBoard using the new board designed, and programmed with the firmware that we prototyped on the previous Arduino setup. 

Currently it's a minimal setup, with only the essentially components soldered into place (the CPU, the RS232 level shifting chip, some debugging LEDs, the resistors and capacitors). All looks good so far. 


Sunday, April 27, 2014

CannonBoard Latest Hardware Design

Colin is continuing to make great progress designing the CannonBoard hardware. Below you can see the latest iteration. You'll note that the Arduino is no-more, and a CPU fully integrated with the design. So to use CannonBall in a cabinet, you'll need a PC, the CannonBoard interface, and a VGA to CGA card / Ultimarc Arcade VGA or video card with soft 15khz.

It's possible that I'll port CannonBall to something like an ODroid so that you don't even need a bulky PC but that will come later.


I've been implementing some diagnostics options in CannonBall that will make it easier to work with a real cabinet. Not particularly exciting, but certainly useful. 

The outputs, including the start lamp and brake light should also now be hooked up.


Wednesday, April 16, 2014

CannonBoard Motion Control Part 2

The CannonBoard interface is progressing really nicely. Colin sent me this video earlier of the full moving cabinet working in conjunction with CannonBall.

You can see the motor calibration code is ported which moves the cabinet left and right at startup before finally centering. The in-game motor code, which I'd originally ported for force-feedback PC based steering wheels, can now be used as originally intended - to drive the cabinet's motor!


The dream is slowly becoming a reality and it's great to see the level of care and attention Colin has been pouring in to get the hardware just right. He is continuing to work on the audio interface next. 

Wednesday, April 09, 2014

CannonBoard Motion Control

In between changing nappies, I've had a small amount of time to work on the software side of CannonBoard. We're starting to get full motion control working with the sitdown cabinet.

The below video shows Colin demonstrating his OutRun cabinet connected to the Cannonboard interface. Currently the Arduino is running a ported version of the motor calibration code. This shows the interface is working and we'll be able to control the motor hardware from a PC running CannonBall.


In addition to this, we've verified that the previous work on the controls works via the original cabinet. It's a bit tricky to demonstrate though as the monitor output is to the PC currently.


My next steps are to finish the in-game motion control code and ensure the cabinet is moving correctly with the interface. Then controls and movement will be proven.

Colin is working on a version of the interface that removes the Arduino entirely. He is also working on the cabinet audio hardware interface. 

Saturday, March 15, 2014

CannonBoard First Steps

As a reminder CannonBoard is a project to enable OutRun machines to be cleanly swapped to a PC running CannonBall. A modern PC connects to an Arduino which in turn is connected to the CannonBoard hardware. The OutRun controls then plug directly into the CannonBoard hardware.

Colin posted me a prototype CannonBoard PCB last week. Click the images for a larger version.


Here's a shot from the back so you can see how it connects to the Arduino.


Here it is connected up to my chaotic test harness with the original OutRun connectors:


To make testing simpler, I'm using my hacked together OutRun controls. I normally attach these to an original OutRun PCB, but they're perfect for testing this setup.


Some LOL wiring here. It all works though. Note the stylish shoebox. 

CannonBall is currently working with the controls, which means there's no reason this shouldn't work with the original controls in a proper cabinet now. I've sent a test version back to Colin to play around with. In the meantime, I'm just pleased to have my name on a PCB.


I have another project in the pipeline - Project Baby. It's due to start any day now and will likely consume a fair chunk of time ;) Aside from that, I'll be working on the CannonBoard interface mostly during my moments of spare time. I'm looking forward to getting the motor outputs hooked up among other things.

Tuesday, January 14, 2014

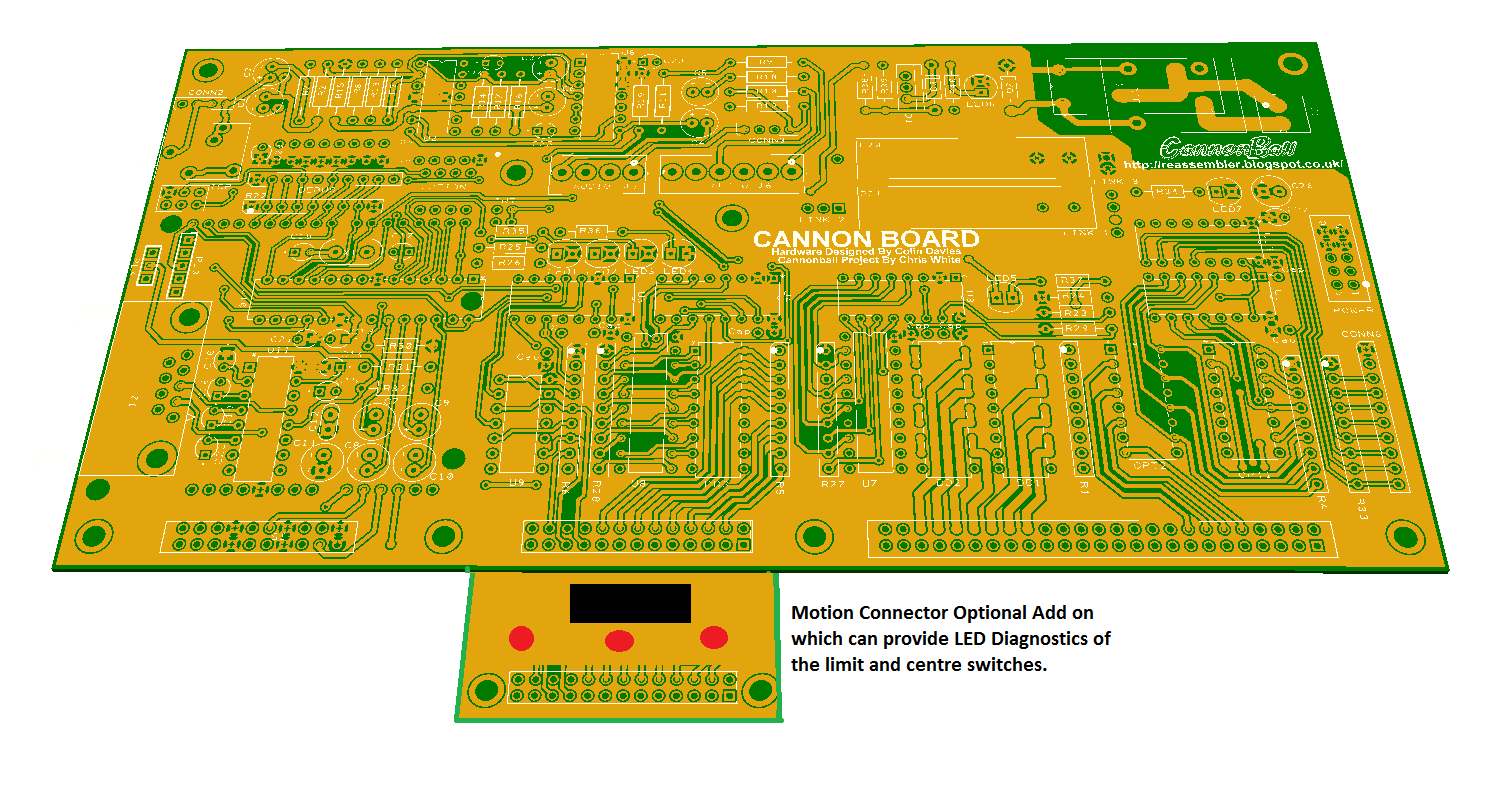
CannonBoard Hardware Update

Colin Davies has been making solid progress on the CannonBoard project. This is the plug and play hardware interface that allows you to cleanly swap a modern PC into an original OutRun cabinet and run CannonBall.

"The audio is now hooked up to the original connectors. There is also a power supply input and dummy experimental load resistors to keep the Outrun PSU happy as it requires a minimum load (about 1 amp / 5 watts). This is important to balance the 5v for reliability and for the rest of the electronics on board to function. It will be optional whether the board runs from the Outrun 5v or the Arduino 5v."

The analog inputs still need to be hooked up; you can see the I/O layout below.


Soon we'll be at a point where we can start running some tests with CannonBall.


Wednesday, November 27, 2013

CannonBoard

Colin Davies and myself are working on an exciting new project for owners of original OutRun cabinets: CannonBoard. 

The goal is to allow the original OutRun PCB to be cleanly replaced with a modern PC running CannonBall. There will be no soldering; no cable cutting and absolutely no cabinet butchery. Damaging original cabinets makes us very very sad. Simply unplug the cables from the PCB and connect to our interface. Restore your cabinet to the original PCB at any point. It's plug and play!

This approach has a number of advantages. You'll have 60 fps, a wealth of easily configurable options and the ability to play tracks from LayOut. Plus you can tinker with the CannonBall source code if you're technically minded. If this fills you with horror, you can turn all the options off to ensure your experience is identical to the original game whilst furiously sucking a Werther's original.

Colin is working on the hardware interface. A standard Windows, Mac or Linux machine will connect via USB to a cheap $10 Arduino board, mounted on a custom PCB. This custom PCB plugs into the cabinet controls.

Custom PCB


I'm working on the software side of things. CannonBall will communicate with the Arduino to receive inputs from the controls and output to the cabinet motors and lights. I've got the easy job, although I do need to port some more of the OutRun cabinet related code that I missed out. 
Arduino

We're aiming to support all cabinet models from the mini through to the deluxe sitdown. Like all good hobby projects, there is no strict schedule attached to the project. But progress so far is looking promising.